Sunday, January 7, 2024

Mini Calendar with Post-It-Note holder


Hello my stamping friends. My share for you today is a little gift I am making for my co-workers. It is a calendar and post-it-note holder all in one. I even purchased mini glitter gel pens so that it all displays nicely on their desks. I got the instructions for this project from Melissa Seplowitz at The Stamping Ninja. I love her design. I have measurements and instructions listed below for you.

You will need two pieces of Crumb Cake. 
1.  8½ x 5½ scored at 4¼
2.  4 x 5¼ scored at ½, 2, 3½ with 4" at top

You will need two pieces of Gorgeous Grape.
1.  4 x 5¼
2.  4½ x 5½ 
with 4½ at top, score ½ from each end
with 5½ at top, score at 2½ & 3

You will need two pieces of designer paper
5⅛ x 3⅞ and 3⅜ x 2⅜

Instructions:
  1. Fold the Crumb Cake layer that measures 8½ x 5½ in half for the card base.
  2. Adhere the designer paper that measures 5⅛ x 3⅞ to the Gorgeous Grape layer that measures 4 x 5¼ and then onto the card base.
  3. Reinforce the score lines on the 4½ x 5½ Gorgeous Grape layer.
  4. On the middle section, cut up both score lines, stopping at the other score line. Miter cut the little squares so that it is easier to put the box together. This will be the holder for the post-it-notes.  
  5. Apply adhesive to the little squares and along two of the long rectangles, across from each other.
  6. Adhere the small square tabs to back side of the rectangles that you put adhesive on.
  7. Fold the rectangles without adhesive onto the rectangles that have the adhesive.
  8. Adhere the designer paper that measures 3⅜ x 2⅜ to the front of your box.
  9. On the Crumb Cake layer that measures 4 x 5¼, the two ½ sections will be folded into valleys, and the center score will be a mountain. You will add adhesive to the back side of the ½" sections. I used tear & tape. This will make the easel to make the card stand up.


  10. Working with one side at a time, adhere the easel to the inside of your card making the folded edge even with the bottom of the card base, and centering it left to right.
  11. Adhere your box onto the card front. I like mine towards the bottom right corner, but you can place it where you want. 
  12. Adhere a mini calendar ( I got mine from Tailored Expressions) to the front of the box and add your post-it-note pad (mine are 3 x 3)
  13. You can also add a mini gel pen as well.
I have a video for you showing just how simple this cute calendar is to put together.

Supplies I used can be found HERE

Thanks so much for stopping by!! I really appreciate it.
  
To get updates in your inbox when I post to my blog, please click HERE


CLICK HERE to shop with me 24/7.  


Friday, January 5, 2024

2024 Jan - April Mini Catalog now available


Hello stamping friends, I just wanted to pop in today to let you know that the January - April 2024 mini catalog is now live. Also, Sale-A-Bration has begun as well. Sale-A-Bration is when you can earn free product by placing a minimum order of $50, before tax and shipping. Below is a walk-though I did with France "Frenchie" Martin. We always have fun together and hope you learn a few tips as you watch us.

If you don't have the new catalogs, and are not currently working with another demonstrator, please contact me and I will get copies in the mail to you. I have links to both the new catalog and the Sale-A-Bration brochure on my sidebar.

Click the picture below to watch the video.


Thanks so much for stopping by!! I really appreciate it.
  
To get updates in your inbox when I post to my blog, please click HERE


CLICK HERE to shop with me 24/7.  


Sunday, November 19, 2023

Fun Fold - Twisted Easel Book Binding


Hello my stamping friends. Today I am sharing with you a card I did for my monthly class. It's so simple, but so cute. I used the Beary Christmas designer paper for the star of the show.

Measurements:
Night of Navy: 4¼ x 11, scored at 4¼ & 5½ - you will also score from the 4¼ bottom left score line diagonally to the top right corner
Night of Navy: 4 x 4 plus scrap for greeting layer
Designer Paper: 3⅞ x 3⅞, 1 x 4
Basic White: 4 x 4 plus scrap for greeting

Instructions:
  1. Fold card base in half at the 5½
  2. Adhere the 1¼ section of the card front closed. This is the "book binding"
  3. The diagonal score line will fold in towards the inside of the card
  4. Adhere the 1 x 4 designer paper in the center of the "book binding" section
  5. Adhere the 3⅞ x 3⅞ designer paper to the 4 x 4 Night of Navy layer
  6. Adhere the 4 x 4 layer to just the bottom section of the card front
  7. Either hand cut one of the polar bears or use the beary cute punch to cut one of the coordinating bears from the paper.
  8. Adhere the bear you cut or punched out to the bottom right corner of the 4 x 4 Basic White layer with Stampin' Dimensionals.
  9. Stamp the sentiment on the Basic White layer with Night of Navy ink. Adhere this layer to the inside of the card.
  10. Stamp the greeting onto the scrap of Basic White with Real Red ink. Cut with the Deckled Circle dies (the smallest one)
  11. Use the next to the smallest Deckled Circle die and cut the Night of Navy scrap
  12. Adhere the stamped greeting to the navy circle and then to the card front
  13. Randomly add a few of the Adhesive-Backed Snowflake Assortment snowflakes to the card front.


I have a video for you below that shows exactly how this card is assembled.


My complete supplies list can be found by clicking the image below:


Thanks so much for stopping by!! I really appreciate it.
  
To get updates in your inbox when I post to my blog, please click HERE


CLICK HERE to shop with me 24/7.  


Customer Appreciation: I have teamed up with 9 other demonstrators and we will be showcasing cards made using the color coach from Stampin' Up! Place an order of $50 or more (before tax and shipping) with me and you will qualify for this fabulous tutorial which will be emailed to you to download. This month's focus is the 10 colors from the Neutrals family. 

Tuesday, October 10, 2023

Mystery Stamping with France "Frenchie" Martin


Howdy stampers. Welcome back. Today my share is the Mystery Stamping that I did live with France "Frenchie" Martin. I love working with her and think we make a great team. We are sharing a simple card with you and then showing you how to crank it up a notch and showing you a more stepped-up version of the same card. Below are the cut pieces that I shared for the simple version.


Measurements: 

Card Base (white or vanilla): 4¼ x 11 scored at 5½
Designer Paper: 3¼ x 5¼, ¾ x 4 (Garden Walk)
Coordinating designer paper: ¾ x 5¼ (Garden Walk)
Coordinating card stock: 2⅝ x 2⅝ (Poppy Parade), 3¾ x ½, 3¼ x ½, 1¾ x 1 (Pretty Peacock)
White or Vanilla: 2½ x 2½

This is my simple card.


For all of my samples, I started with my designer paper cut at 4 x 5¼. I then cut off a strip that measured ¾ x 5¼. I flipped this piece over and re-attached it to the remaining designer paper. I show you in the video how I do this with Tear & Tape adhesive. 

I have 2 samples for my stepped up version of this card below for you.

Measurements:

Card Base (white or vanilla): 4¼ x 11 scored at 5½
Designer Paper: 3¼ x 5¼, ¾ x 4 (Garden Walk)
Coordinating designer paper: ¾ x 5¼ (Garden Walk)
Coordinating card stock: 2⅝ x 2⅝ (Petal Pink), 3¾ x ½, 3¼ x ½, 1¾ x 1 (Mossy Meadow)
Coordinating card stock: 1 x 5¼ (Calypso Coral)
White or Vanilla: 2½ x 2½
Calypso Coral Braided Linen Trim: 6" and about 8"


On this card I attached the designer paper back together as shown in the video. Then I cut the 1 x 5¼ Calypso Coral in half with the Basic Borders dies. I attached one half to the designer paper right where the two designs met. I then wrapped the 6" piece of trim over the seam, adhering it to the back. It was then ready to be adhered to the card base. For the inside of the card I cut the other half of die cut from the Basic Borders die to 4" and then added above the designer paper. The rest of the assembly is shown in the video.


Measurements for the card made in the video:

Card Base (white or vanilla): 4¼ x 11 scored at 5½
Designer Paper: 3¼ x 5¼, ¾ x 4 (Garden Walk)
Coordinating designer paper: ¾ x 5¼ (Garden Walk)
Coordinating card stock: 2⅝ x 2⅝, 3¾ x ½, 3¼ x ½, 1¾ x 1 (Garden Green)
Coordinating card stock: 1 x 5¼ (Calypso Coral)
White or Vanilla: 2½ x 2½
Balmy Blue Double-Stitched Ribbon: 6"
Gold & Silver Trim Combo: about 8"


This card was assembled the same as example 2. For all of my samples I used the Sentimental Park stamp set. For all of my supplies, please click the image below.


If you missed the live stamping, you can watch it here

 https://www.youtube.com/watch?v=LpK6Gt_O4eg

I would love it if you would join my team. Stampin' Up! has a wonderful starter kit offer for the whole month of October. If you would like to take advantage of this deal you can click the image below to go to my site and click on Join. There is no obligation to purchase this starter kit. You can choose to stay active with a $300 purchase per quarter, or you can get the starter kit and do nothing else.

It’s our 35th anniversary and we want to celebrate! From 3–31 October, you can choose one of the

following options for your Starter Kit when you sign up as a new Stampin’ Up! Demonstrator.

- Option 1: Get 35% OFF the cost of your Starter Kit ($125 worth of product for $64.35!)

- Option 2: Get 35% MORE product with your Starter Kit (spend $99 and get $168.75 worth of product!)

Both options get you free shipping and free business supplies—not to mention all the fun that comes with being a part of Stampin’ Up! And, by signing up for this offer, you’ll even receive free registration to our online OnStage event this November! (A $77 value!)

Who doesn't love free shipping?  Stampin' Up! is offering free shipping on orders placed on October 9, 10, 11 of 2023 and a minimum purchase of $75 (not including tax and shipping) Click the image below to go right to my site and click on Shop Now.


Thanks so much for stopping by!! I really appreciate it.
  
To get updates in your inbox when I post to my blog, please click HERE


CLICK HERE to shop with me 24/7.  

Customer Appreciation: I have teamed up with 9 other demonstrators and we will be showcasing cards made using the color coach from Stampin' Up! Place an order of $50 or more (before tax and shipping) with me and you will qualify for this fabulous tutorial which will be emailed to you to download. This month's focus is the 10 colors from the Brights family. 

Saturday, September 23, 2023

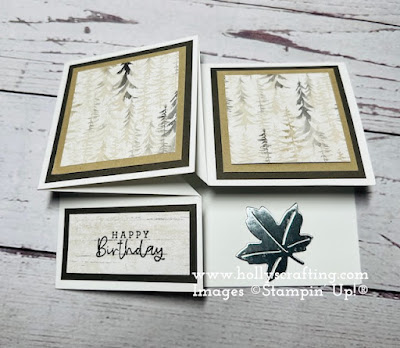
Fun Fold - Corner Flap Over with Video


Hello my stamping friends. I have a fun fold for you today that I am calling a Corner Flap Over fold. I don't remember who I first saw this from, but it is definitely not my design. I recommend using regular weight card stock for this fold as it gets rather thick in spots. This is one of the cards we did at my class this month.

Measurements:

Basic White: 8¼ x 7
Pebbled Path: 2½ x 2½ *2, 2½ x 1¼
Crumb Cake: 2¼ x 2¼ *2
Silver Foil: 1¾ x 1¾

Scoring the card base:

With 8¼ on top, score at 2¾
With 7 on top, score at 4¼
with 8¼ on top, make a small pencil mark at 5½, turn paper clockwise so that the 7" is across the top. Make a small pencil mark at 1½. Now score diagonally lining up these pencil marks in the scoring track. Make sure that you are scoring through the middle of the other 2 score lines you did.

Please watch my video on how to assemble the card. I would love it if you liked and subscribed to my channel.


Supplies List: click image below for the complete supplies list. This will add all of the products to your shopping cart with me so just be sure to uncheck the items you already have.


Thanks so much for stopping by!! I really appreciate it.


To get updates in your inbox when I post to my blog, please click HERE


CLICK HERE to shop with me 24/7.  


Customer Appreciation: I have teamed up with 9 other demonstrators and we will be showcasing cards made using the color coach from Stampin' Up! Place an order of $50 or more (before tax and shipping) with me and you will qualify for this fabulous tutorial which will be emailed to you to download. This month's focus is the 10 colors from the Regals family. 

Sunday, September 10, 2023

Team Swap with the Sept - Dec Mini catalog


Hello my stamping friends. My share for you today is the card I made for our team swap. We do a swap each time we have a new catalog so this card is for the September - December 2023 Mini Catalog. I love participating in swaps as you make a few of the same card and then get the same amount of different cards back. This is a great resource for inspiration. I have the supplies, measurements and instructions listed below for you.

Measurements:
Melon Mambo: 4¼ x 11 scored at 5½, 3¼ x 2
Basic White: 4 x 5¼ * 2, 3 x 1½
Flirty Flamingo: 2¼ x 4¼
Merry Bold & Bright designer paper: 2 x 4, 4 x 1¼, 4 x ¾, 6 x 2½ (flap of envelope)

Instructions: 
  1. Emboss one Basic White layer with the Disressed Tile 3D folder and adhere to card base. As an alternate, I cut this layer with the Dots & Spots die instead of embossing it. I like both designs.
  2. Adhere the 2 x 4 designer paper to the 2¼ x 4¼ Flirty Flamingo layer and then to card front.
  3. Adhere the 4 x 1¼ designer paper across the card front
  4. Using the Something Fancy dies, cut both the Melon Mambo and Basic White layers.
  5. Stamp the greeting onto the Basic White label with Real Red ink. Adhere to the Melon Mambo label and then to the card front with Stampin' Dimensionals.
  6. Add some of the Daffodil Delight Glossy Dots to the card front.
  7. Adhere the remaining designer paper strip to 4 x 5¼ inside layer and then to the inside of the card.


Supplies:
  • click the image below to add all of the supplies to your shopping cart with me. Just remember to uncheck the items you already have.

Thanks so much for stopping by!! I really appreciate it.
  
To get updates in your inbox when I post to my blog, please click HERE


CLICK HERE to shop with me 24/7.  


Customer Appreciation: I have teamed up with 9 other demonstrators and we will be showcasing cards made using the color coach from Stampin' Up! Place an order of $50 or more (before tax and shipping) with me and you will qualify for this fabulous tutorial which will be emailed to you to download. This month's focus is the 10 colors from the Regals family. 

Wednesday, August 16, 2023

Darling Details Thinking of You


Hello my stamping friends. I am back today to share with you one of the cards I made for my card class this month. The card it self is pretty straight forward, but we used plastic wrap to make the designer paper. I have all of the details in the video below for you.

Measurements:

Lemon Lime Twist 8½ x 5½ scored at 4¼ for the card base
Basic White: 4 x 5¼, 2½ x 8½, 3½ x 4¾
Melon Mambo: 1½ x 5¼, 4 x 5¼

For a complete list of supplies, please click HERE. This will add all of the supplies to your shopping cart with me so be sure to uncheck the items you already have.

I have a video for you below that shows how I put this card together. I hope you enjoy.


Thanks so much for stopping by!! I really appreciate it.
  
To get updates in your inbox when I post to my blog, please click HERE


CLICK HERE to shop with me 24/7.  

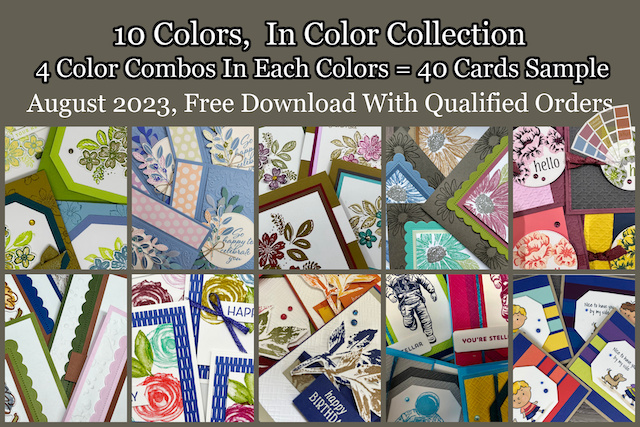
Customer Appreciation: I have teamed up with 9 other demonstrators and we will be showcasing cards made using the color coach from Stampin' Up! This month's focus is the 10 In-Colors and you will receive a PDF download of 40 cards. All orders of $50 or more (before tax and shipping and after bonus days coupons) with me will receive this fabulous tutorial.


Sunday, August 13, 2023

Gatefold with a Twist with video


Hello my stamping friends. My share for you today is a card I did for last month's card class. I always try to do a different fun fold for them each month and I think this one qualifies as a fun fold. It's super easy as well. I have a video for you below showing how to put this card together.

Measurements:
Thick Basic White: 8½ x 5½ scored at 1 & 5¼ with the 8½ across the top
Misty Moonlight: 3½ x 4¼ 
Vellum: 3½ x 4¼
Basic White: 2½ x 4¼, 2¼ x ½, 3 x 3


Click HERE for a complete supplies list. This link will add all of the supplies to your shopping cart, so make sure you uncheck the items you already have.


Thanks so much for stopping by!! I really appreciate it.
  
To get updates in your inbox when I post to my blog, please click HERE


CLICK HERE to shop with me 24/7.  

Customer Appreciation: I have teamed up with 9 other demonstrators and we will be showcasing cards made using the color coach from Stampin' Up! This month's focus is the 10 In-Colors and you will receive a PDF download of 40 cards. All orders of $50 or more (before tax and shipping and after bonus days coupons) with me will receive this fabulous tutorial.