Saturday, September 23, 2023

Fun Fold - Corner Flap Over with Video


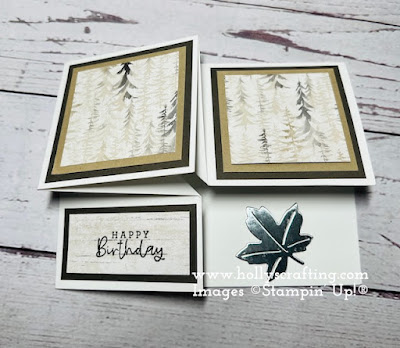
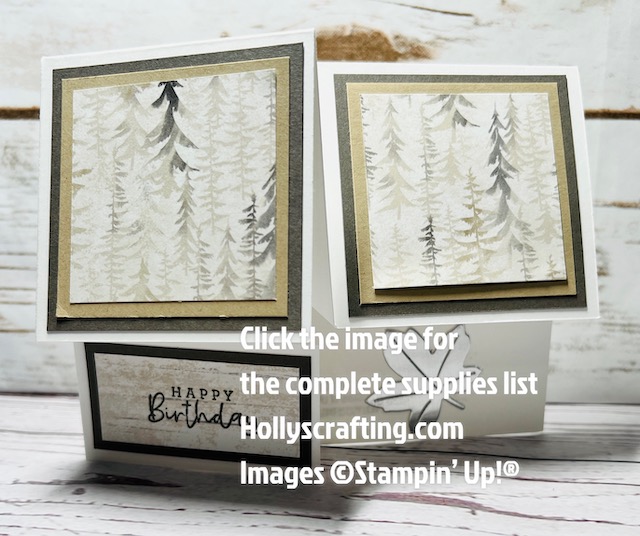
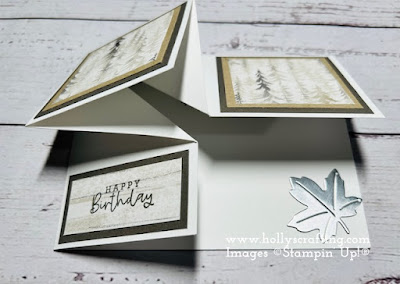
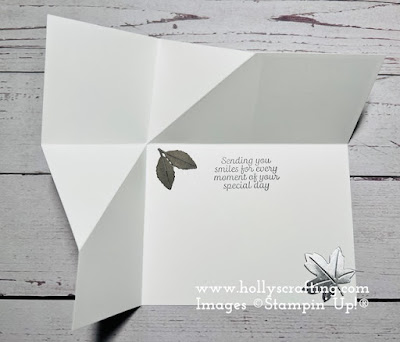
Hello my stamping friends. I have a fun fold for you today that I am calling a Corner Flap Over fold. I don't remember who I first saw this from, but it is definitely not my design. I recommend using regular weight card stock for this fold as it gets rather thick in spots. This is one of the cards we did at my class this month.

Measurements:

Basic White: 8¼ x 7
Pebbled Path: 2½ x 2½ *2, 2½ x 1¼
Crumb Cake: 2¼ x 2¼ *2
Silver Foil: 1¾ x 1¾

Scoring the card base:

With 8¼ on top, score at 2¾
With 7 on top, score at 4¼
with 8¼ on top, make a small pencil mark at 5½, turn paper clockwise so that the 7" is across the top. Make a small pencil mark at 1½. Now score diagonally lining up these pencil marks in the scoring track. Make sure that you are scoring through the middle of the other 2 score lines you did.

Please watch my video on how to assemble the card. I would love it if you liked and subscribed to my channel.


Supplies List: click image below for the complete supplies list. This will add all of the products to your shopping cart with me so just be sure to uncheck the items you already have.


Thanks so much for stopping by!! I really appreciate it.


To get updates in your inbox when I post to my blog, please click HERE


CLICK HERE to shop with me 24/7.  


Customer Appreciation: I have teamed up with 9 other demonstrators and we will be showcasing cards made using the color coach from Stampin' Up! Place an order of $50 or more (before tax and shipping) with me and you will qualify for this fabulous tutorial which will be emailed to you to download. This month's focus is the 10 colors from the Regals family. 

Sunday, September 10, 2023

Team Swap with the Sept - Dec Mini catalog


Hello my stamping friends. My share for you today is the card I made for our team swap. We do a swap each time we have a new catalog so this card is for the September - December 2023 Mini Catalog. I love participating in swaps as you make a few of the same card and then get the same amount of different cards back. This is a great resource for inspiration. I have the supplies, measurements and instructions listed below for you.

Measurements:
Melon Mambo: 4¼ x 11 scored at 5½, 3¼ x 2
Basic White: 4 x 5¼ * 2, 3 x 1½
Flirty Flamingo: 2¼ x 4¼
Merry Bold & Bright designer paper: 2 x 4, 4 x 1¼, 4 x ¾, 6 x 2½ (flap of envelope)

Instructions: 
  1. Emboss one Basic White layer with the Disressed Tile 3D folder and adhere to card base. As an alternate, I cut this layer with the Dots & Spots die instead of embossing it. I like both designs.
  2. Adhere the 2 x 4 designer paper to the 2¼ x 4¼ Flirty Flamingo layer and then to card front.
  3. Adhere the 4 x 1¼ designer paper across the card front
  4. Using the Something Fancy dies, cut both the Melon Mambo and Basic White layers.
  5. Stamp the greeting onto the Basic White label with Real Red ink. Adhere to the Melon Mambo label and then to the card front with Stampin' Dimensionals.
  6. Add some of the Daffodil Delight Glossy Dots to the card front.
  7. Adhere the remaining designer paper strip to 4 x 5¼ inside layer and then to the inside of the card.


Supplies:
  • click the image below to add all of the supplies to your shopping cart with me. Just remember to uncheck the items you already have.

Thanks so much for stopping by!! I really appreciate it.
  
To get updates in your inbox when I post to my blog, please click HERE


CLICK HERE to shop with me 24/7.  


Customer Appreciation: I have teamed up with 9 other demonstrators and we will be showcasing cards made using the color coach from Stampin' Up! Place an order of $50 or more (before tax and shipping) with me and you will qualify for this fabulous tutorial which will be emailed to you to download. This month's focus is the 10 colors from the Regals family.