Showing posts with label thinking of you. Show all posts

Wednesday, June 25, 2025

Mixed Florals - Heat embossing on designer paper


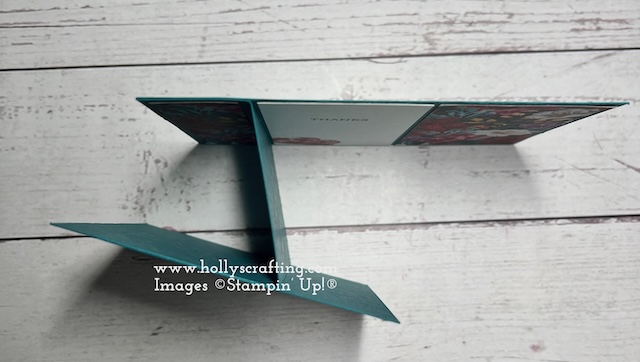
Hello my stamping friends. I am back today to share with you how you can heat emboss on designer paper and get a wow effect. This card is so simple, yet elegant using black and white with a pop of color (Lemon Lolly). I am not much of a yellow fan, but I love the soft color of Lemon Lolly. It is a great addition to our color families. The measurements are below, as well as the supplies and my video.

Measurements:
Basic Black 4¼ x 11 scored at 5½ for the card base
Lemon Lolly: 2 pieces at 4 x 5¼
Botanical Textures dsp: 3¾ x 5
Basic White: 3½ x 4¾
Black & Very Vanilla Check Ribbon: about 5½ inches and about 4 inches


You will find all of the supplies used in My Online Store.

My Video will show you how simple this card is to make. I made one version as a sympathy card and the other as a birthday card. With the thinking of you sentiment, you could use this card for any occasion.


Thanks so much for stopping by!! I really appreciate it.
  
To get updates in your inbox when I post to my blog, please click HERE


CLICK HERE to shop with me 24/7.  


Tuesday, May 20, 2025

Pop Out Panel Fun Fold


Hello my stamping friends. I am back today with inspiration I got from a swap card I received from Sarah Simon. This fun fold is a wow card that displays nicely and fits in a medium Stampin' Up! envelope. It will probably take extra postage as there are a few layers and folds. I have the measurements, supplies and a video for you below. Hope you enjoy.


Measurements:
Peach Pie: 8½ x 5½ scored at 2⅛, 4¼, 6⅜
Peach Pie: 8¼ x 1¾ scored at 2⅛, 3⅛, 5⅛, 6⅛
Peach Pie: 3¼ x 4¾ cut with the 3rd largest Everyday Arches
Blackberry Bliss: 3 x 4¼ cut with the 4th largest Everyday Arches
Basic White: 2½ x 4 cut with the 5th largest Everyday Arches
Basic White: cut 2 @ 2 x 5⅜, 4¼ x 3 for stamping
Floral Impressions designer paper: cut 2 @ 2 x 5⅜
Flowering Zinnia designer paper (retired) or any coordinating paper: cut 2 @ 2 x 5⅜


You will find the supplies used IN MY ONLINE STORE

I also have a VIDEO for you as well.


Thanks so much for stopping by!! I really appreciate it.
  
To get updates in your inbox when I post to my blog, please click HERE


CLICK HERE to shop with me 24/7.  


Tuesday, January 7, 2025

Country Flowers fun fold


Today I will show you how to create this fun fold card. It looks like the swing focal layer is a separate piece of cardstock, but it is made straight from the card base with an extra score line and a couple of cuts. I show you this in my video below.


Measurements
Misty Moonlight: 4¼ x 11 scored at 2¼ & 5½
Misty Moonlight: 2 pieces of 4½ x 2¼
DSP Pattern 1: 2 pieces of4⅜ x 2⅛
DSP Pattern 2: 2 pieces of 3⅛ x 4⅛
DSP Pattern 3: 5⅜ x 4⅛
Basic White: 2 pieces of 4¼ x 2

You can find the complete supplies list on MY Online Store.


Click HERE for the link for my video.

Thanks so much for stopping by!! I really appreciate it.

  
To get updates in your inbox when I post to my blog, please click HERE


CLICK HERE to shop with me 24/7.  


Sunday, January 5, 2025

Regal Flora Fun Fold


Hello stamping friends. I have a super easy fun fold for you today using the Regal Flora Bundle. Unfortunately, the stamp set is no longer available and the dies and paper are on the last chance list. However, this fold could be adapted to any papers and stamps that you have. The link to my supply list is below as well as the measurements. I also have a video for you below showing you how to put the card together.

Measurements
Pretty Peacock: 4¼ x 11 scored at 5½, 6¾, 8⅞
Pretty Peacock: 4 x 4¼
Cherry Cobbler: 3½ x 2
Basic White: 2 x 4 (inside) & 4¼ x 3 (stamping)
Regal Winter designer paper:
     Pattern 1: 3¾ x 4
     Pattern 2: 1 x 4 & 2 x 4
     Pattern 3: 3¾ x 1


My complete Supply List will take you to my online store and add all of my supplies to your cart. Just be sure to uncheck the items you already have.

You can view my video HERE

Thanks so much for stopping by!! I really appreciate it.
  
To get updates in your inbox when I post to my blog, please click HERE


CLICK HERE to shop with me 24/7.  


Sunday, November 17, 2024

Happy Hibiscus with Baby Wipe Technique


Hello my stamping friends. My next couple of videos will be about different stamping techniques. Today's post includes baby wipes. This is an oldie, but goodie. Take a couple of baby wipes and fold them in half. Add 2-3 different reinkers to the baby wipes and you now have a multi-colored stamp pad. Today we are just using it to add color to a border, but you can use it with your stamps as well. I have the supplies and a video below for you.

Measurements:

Basic Black: 4¼ x 11 scored at 5½
Coastal Cabana: 4 x 5¼
Basic White: 4 x 5¼
Basic White: 3 x 4 for stamping
Basic White: 1 x 5¼ die cut with Elegant Borders
Black & Very Vanilla Large Check Ribbon: 6½" & 4½"


The complete supplies list can be found HERE and I have the video below.


Thanks so much for stopping by!! I really appreciate it.
  
To get updates in your inbox when I post to my blog, please click HERE


CLICK HERE to shop with me 24/7.  

Customer Appreciation: I have teamed up with 9 other demonstrators and we will be showcasing cards made using the color coach from Stampin' Up! Place an order of $50 or more (before tax and shipping) with me and you will qualify for this fabulous tutorial which will be emailed to you to download. This month's focus is the 10 colors from the In Colors. 

Tuesday, January 16, 2024

Cascading Pleats with Cheerful Daisies


Hello my stamping friends. I have a fun fold card to share with you today. It's called Cascading Pleats and I saw this from Susan Campfield. It looks difficult, but it is actually really easy. I have a video for you below that shows you how to score and cut the paper, and then to assemble the card. I have the measurements listed in the video, but have them here as well. 

Measurements: White: 4¼ x 9½, scored at 1, 2, 3, 4 - mark the edge @ 1½, on 1" score line mark at 1½, on 2" and 3" score lines mark at ¾ White: 2@ 4¾ x 3½, 4 x 2¾ Moody Mauve: 5¼ x 4, 4½ x 3¼, 3¾ x 2½ DSP: 4¼ x 3


For all of the details, please watch the video below.


Supplies can be found by clicking HERE


Thanks so much for stopping by!! I really appreciate it.
  
To get updates in your inbox when I post to my blog, please click HERE


CLICK HERE to shop with me 24/7.  

Tuesday, October 10, 2023

Mystery Stamping with France "Frenchie" Martin


Howdy stampers. Welcome back. Today my share is the Mystery Stamping that I did live with France "Frenchie" Martin. I love working with her and think we make a great team. We are sharing a simple card with you and then showing you how to crank it up a notch and showing you a more stepped-up version of the same card. Below are the cut pieces that I shared for the simple version.


Measurements: 

Card Base (white or vanilla): 4¼ x 11 scored at 5½
Designer Paper: 3¼ x 5¼, ¾ x 4 (Garden Walk)
Coordinating designer paper: ¾ x 5¼ (Garden Walk)
Coordinating card stock: 2⅝ x 2⅝ (Poppy Parade), 3¾ x ½, 3¼ x ½, 1¾ x 1 (Pretty Peacock)
White or Vanilla: 2½ x 2½

This is my simple card.


For all of my samples, I started with my designer paper cut at 4 x 5¼. I then cut off a strip that measured ¾ x 5¼. I flipped this piece over and re-attached it to the remaining designer paper. I show you in the video how I do this with Tear & Tape adhesive. 

I have 2 samples for my stepped up version of this card below for you.

Measurements:

Card Base (white or vanilla): 4¼ x 11 scored at 5½
Designer Paper: 3¼ x 5¼, ¾ x 4 (Garden Walk)
Coordinating designer paper: ¾ x 5¼ (Garden Walk)
Coordinating card stock: 2⅝ x 2⅝ (Petal Pink), 3¾ x ½, 3¼ x ½, 1¾ x 1 (Mossy Meadow)
Coordinating card stock: 1 x 5¼ (Calypso Coral)
White or Vanilla: 2½ x 2½
Calypso Coral Braided Linen Trim: 6" and about 8"


On this card I attached the designer paper back together as shown in the video. Then I cut the 1 x 5¼ Calypso Coral in half with the Basic Borders dies. I attached one half to the designer paper right where the two designs met. I then wrapped the 6" piece of trim over the seam, adhering it to the back. It was then ready to be adhered to the card base. For the inside of the card I cut the other half of die cut from the Basic Borders die to 4" and then added above the designer paper. The rest of the assembly is shown in the video.


Measurements for the card made in the video:

Card Base (white or vanilla): 4¼ x 11 scored at 5½
Designer Paper: 3¼ x 5¼, ¾ x 4 (Garden Walk)
Coordinating designer paper: ¾ x 5¼ (Garden Walk)
Coordinating card stock: 2⅝ x 2⅝, 3¾ x ½, 3¼ x ½, 1¾ x 1 (Garden Green)
Coordinating card stock: 1 x 5¼ (Calypso Coral)
White or Vanilla: 2½ x 2½
Balmy Blue Double-Stitched Ribbon: 6"
Gold & Silver Trim Combo: about 8"


This card was assembled the same as example 2. For all of my samples I used the Sentimental Park stamp set. For all of my supplies, please click the image below.


If you missed the live stamping, you can watch it here

 https://www.youtube.com/watch?v=LpK6Gt_O4eg

I would love it if you would join my team. Stampin' Up! has a wonderful starter kit offer for the whole month of October. If you would like to take advantage of this deal you can click the image below to go to my site and click on Join. There is no obligation to purchase this starter kit. You can choose to stay active with a $300 purchase per quarter, or you can get the starter kit and do nothing else.

It’s our 35th anniversary and we want to celebrate! From 3–31 October, you can choose one of the

following options for your Starter Kit when you sign up as a new Stampin’ Up! Demonstrator.

Option 1: Get 35% OFF the cost of your Starter Kit ($125 worth of product for $64.35!)

Option 2: Get 35% MORE product with your Starter Kit (spend $99 and get $168.75 worth of product!)

Both options get you free shipping and free business supplies—not to mention all the fun that comes with being a part of Stampin’ Up! And, by signing up for this offer, you’ll even receive free registration to our online OnStage event this November! (A $77 value!)

Who doesn't love free shipping?  Stampin' Up! is offering free shipping on orders placed on October 9, 10, 11 of 2023 and a minimum purchase of $75 (not including tax and shipping) Click the image below to go right to my site and click on Shop Now.


Thanks so much for stopping by!! I really appreciate it.
  
To get updates in your inbox when I post to my blog, please click HERE


CLICK HERE to shop with me 24/7.  

Customer Appreciation: I have teamed up with 9 other demonstrators and we will be showcasing cards made using the color coach from Stampin' Up! Place an order of $50 or more (before tax and shipping) with me and you will qualify for this fabulous tutorial which will be emailed to you to download. This month's focus is the 10 colors from the Brights family. 

Wednesday, August 16, 2023

Darling Details Thinking of You


Hello my stamping friends. I am back today to share with you one of the cards I made for my card class this month. The card it self is pretty straight forward, but we used plastic wrap to make the designer paper. I have all of the details in the video below for you.

Measurements:

Lemon Lime Twist 8½ x 5½ scored at 4¼ for the card base
Basic White: 4 x 5¼, 2½ x 8½, 3½ x 4¾
Melon Mambo: 1½ x 5¼, 4 x 5¼

For a complete list of supplies, please click HERE. This will add all of the supplies to your shopping cart with me so be sure to uncheck the items you already have.

I have a video for you below that shows how I put this card together. I hope you enjoy.


Thanks so much for stopping by!! I really appreciate it.
  
To get updates in your inbox when I post to my blog, please click HERE


CLICK HERE to shop with me 24/7.  

Customer Appreciation: I have teamed up with 9 other demonstrators and we will be showcasing cards made using the color coach from Stampin' Up! This month's focus is the 10 In-Colors and you will receive a PDF download of 40 cards. All orders of $50 or more (before tax and shipping and after bonus days coupons) with me will receive this fabulous tutorial.


Sunday, August 13, 2023

Gatefold with a Twist with video


Hello my stamping friends. My share for you today is a card I did for last month's card class. I always try to do a different fun fold for them each month and I think this one qualifies as a fun fold. It's super easy as well. I have a video for you below showing how to put this card together.

Measurements:
Thick Basic White: 8½ x 5½ scored at 1 & 5¼ with the 8½ across the top
Misty Moonlight: 3½ x 4¼ 
Vellum: 3½ x 4¼
Basic White: 2½ x 4¼, 2¼ x ½, 3 x 3


Click HERE for a complete supplies list. This link will add all of the supplies to your shopping cart, so make sure you uncheck the items you already have.


Thanks so much for stopping by!! I really appreciate it.
  
To get updates in your inbox when I post to my blog, please click HERE


CLICK HERE to shop with me 24/7.  

Customer Appreciation: I have teamed up with 9 other demonstrators and we will be showcasing cards made using the color coach from Stampin' Up! This month's focus is the 10 In-Colors and you will receive a PDF download of 40 cards. All orders of $50 or more (before tax and shipping and after bonus days coupons) with me will receive this fabulous tutorial.

Saturday, July 31, 2021

Art Gallery - Thinking of You


Hello my stamping friends.  My share for you today is a sympathy card for one of my friends who just lost her Dad.  I am hoping this card brightens her day in this time of sorrow.  I have all of the details for you below.

Measurements:  
Smoky Slate: 4¼ x 11 scored at 5½
Coastal Cabana: 4-1/8 x 5-3/8
Basic Gray: 3-7/8 x 5-1/8
Basic White: 2½ x 7½,  4 x 5¼

Instructions: 
  1. Using the White Embossing Paste and the Basic Pattern Decorative Masks, spread some paste all over the Basic Gray layer.  Using one of the spatulas, scrap the paste over the mask.  You will want to work quickly and rinse off the mask and spatula right away as the paste dries quickly.
  2. Adhere the Coastal Cabana layer to the card base.
  3. Stamp the full flower image in Costal Cabana onto the 2½ x 7½ Basic White piece.
  4. Stamp the line image of the flower in Bermuda Bay.
  5. Stamp the stem and leaves in Granny Apple Green onto the same Basic White layer.
  6. Stamp the greeting onto the Basic White layer with Basic Gray.
  7. Use the coordinating dies to cut the flower, stem and leaves and the greeting.
  8. Make sure the paste is dry on the Basic Gray layer and then adhere to card front.
  9. Adhere the stem and leaves to the card front and then adhere the flower with Stampin' Dimensionals.
  10. Adhere the greeting to card front with Stampin' Dimensionals.
  11. Scatter a few Elegant Gems onto the card front.
  12. For the inside, stamp the flowers and stem image at the bottom left side.  I inked the flower part with Coastal Cabana and the leave side with Granny Apple Green.  Then after I stamped it I used the small line image and stamped all three flowers using Bermuda Bay ink.
  13. For the envelope, stamp the large flower image and stem the same way that you stamped the flower for the front.


Thanks so much for stopping by!! I really appreciate it.

I have a complete supply list HERE, or by clicking on the picture below.  This will add all of the supplies to your shopping cart, so just be sure to uncheck the items you already have.


Customer Appreciation. All orders of $40.00 or more before tax and shipping placed in my online store with Hostess Code VTEABJX6 qualifies for the FREE PDF. This month's PDF is all about the Colors & Contours bundle and the Hand-Penned Petals bundle.  This tutorial includes all of the measurements, instructions and supplies to recreate these projects.  If your order is over $150 DO NOT enter the hostess code.  You will get all the stamping rewards and I will still send you the PDF.  All qualified orders will receive the download by e-mail.  

CLICK HERE to shop with me 24/7.