Sunday, July 23, 2023

Picket Fence with Cheerful Daisies and Darling Details


Hello my stamping friends.  I have a new video tutorial for you today using Cheerful Daisies and Darling Details with a picket fence. I have seen and done the lattice cards, but I drive by a house on my way to work every day that has a white picket fence and beautiful flowers in front of it so that was my inspiration for this card. I demonstrated this card for my teammates at our last meeting and a few of them were looking for the video, which at the time I didn't have and and it was recorded during the meeting.  I love it when someone loves my project and wants to CASE it. What an honor! Below is the original card I did for the team. For this one I only used the flowers and leaves from Cheerful Daisies dies.


Here are the measurements for the card in the video.

Thick Basic White: 4¼ x 11 Scored at 5½
Basic White: 4¼ x ½ *3, 3 x 5 for stamped daisies, 1¼ x 8 for the detail layer of daisies.
Highland Heather: 2 x 4½
Fresh as a Daisy designer paper: 4⅛ x 2⅜
Subtles Highland Heather designer paper: 4⅛ x 3
Soft Sea Foam: 1 x 5

Instructions:
  1. Cut 6 ½ inch pieces from the card front so that when you are done you will have 6 strips that measure ½ x 4⅛
  2. Emboss the 6 strips you cut from the card front and the additional 3 strips that measure ½ x 4⅛ with the Timber embossing folder.
  3. Lightly sponge Gray Granite ink over the embossing to distress the fence a little.
  4. With the Take A Banners Pick A Punch, cut the tops of the 6 pickets you cut from the card base.
  5. Adhere the designer paper that looks like the sky onto the card front.
  6. Line up an uncut wood strip horizontally on your work station. Put a small amount of adhesive on the uncut end of the picket and adhere even with the bottom and left edge. Repeat with another picket an line up with the bottom and right edge. If you are using grid paper to line up the rest of the pickets you would skip 2 squares between each one.
  7. Put a little adhesive on the top of each picket, line the bottom edge up with the bottom of the card base and adhere the pickets to card front over your sky paper.
  8. Adhere the remaining two horizontal wood pieces, just putting adhesive on the section of the picket that it will adhere to.
  9. Adhere the remaining designer paper to the inside, making the left, right and bottom margins equal.
  10. On the 3 x 5 Basic White stamp 6 small daisies in Lemon Lolly ink. Cut with coordinating die.
  11. Stamp the centers of the daisies with Pebbled Path ink.
  12. Cut 6 detail daisy images with the remaining Basic White piece and adhere to top of each yellow daisy.
  13. Cut 2 of each of all of the small detail leaves from Darling Details dies.
  14. Cut 3 of the tall flower images from Darling Details dies from the Highland Heather piece.
  15. Adhere some of the daisies flat and some with Stampin' Dimensionals. Be carful not to use too much glue an stick your card shut. You will just want adhesive where the flower is going to sit on the picket. I used 5 daisies on the card front.
  16. With liquid glue tuck the purple flowers and the leaves behind the daisies. 
  17. Adhere the remaining daisy to the inside. (I forgot to do this in the video).


You can click HERE or on the picture below to see all of the supplies I used. This link will add all of the supplies to your shopping cart with me so be sure to uncheck the supplies you already have.


The video can be watched HERE or by clicking on the video below.


Thanks so much for stopping by!! I really appreciate it.
  
To get updates in your inbox when I post to my blog, please click HERE


CLICK HERE to shop with me 24/7.  


Thursday, July 13, 2023

Waves of Inspiration

Hello my stamping friends. I am back today to share with you a card I did for my class this month. The Waves of Inspiration stamp set has been collecting dust so I thought it was time to use it again. I have a video for you below so you can see exactly how I put this together.


Measurements:

Lost Lagoon - 8½ x 5½ scored at 4¼
Pretty Peacock - 5⅜ x 4⅛
Basic White - 4 x 5¼ *2, 5½ x 2¾, 3 x 1¼, scrap for clouds
Soft Shimmer - 5½ x 2¾

You can find all of the supplies I used for this card HERE. This will add all of the supplies to your shopping cart on my site, so be sure to remove the items you already have. 

You can view the video HERE


Thanks so much for stopping by!! I really appreciate it.
  
To get updates in your inbox when I post to my blog, please click HERE


CLICK HERE to shop with me 24/7.  


Wednesday, July 5, 2023

One Sheet Wonder - Mystery Stamping with Frenchie

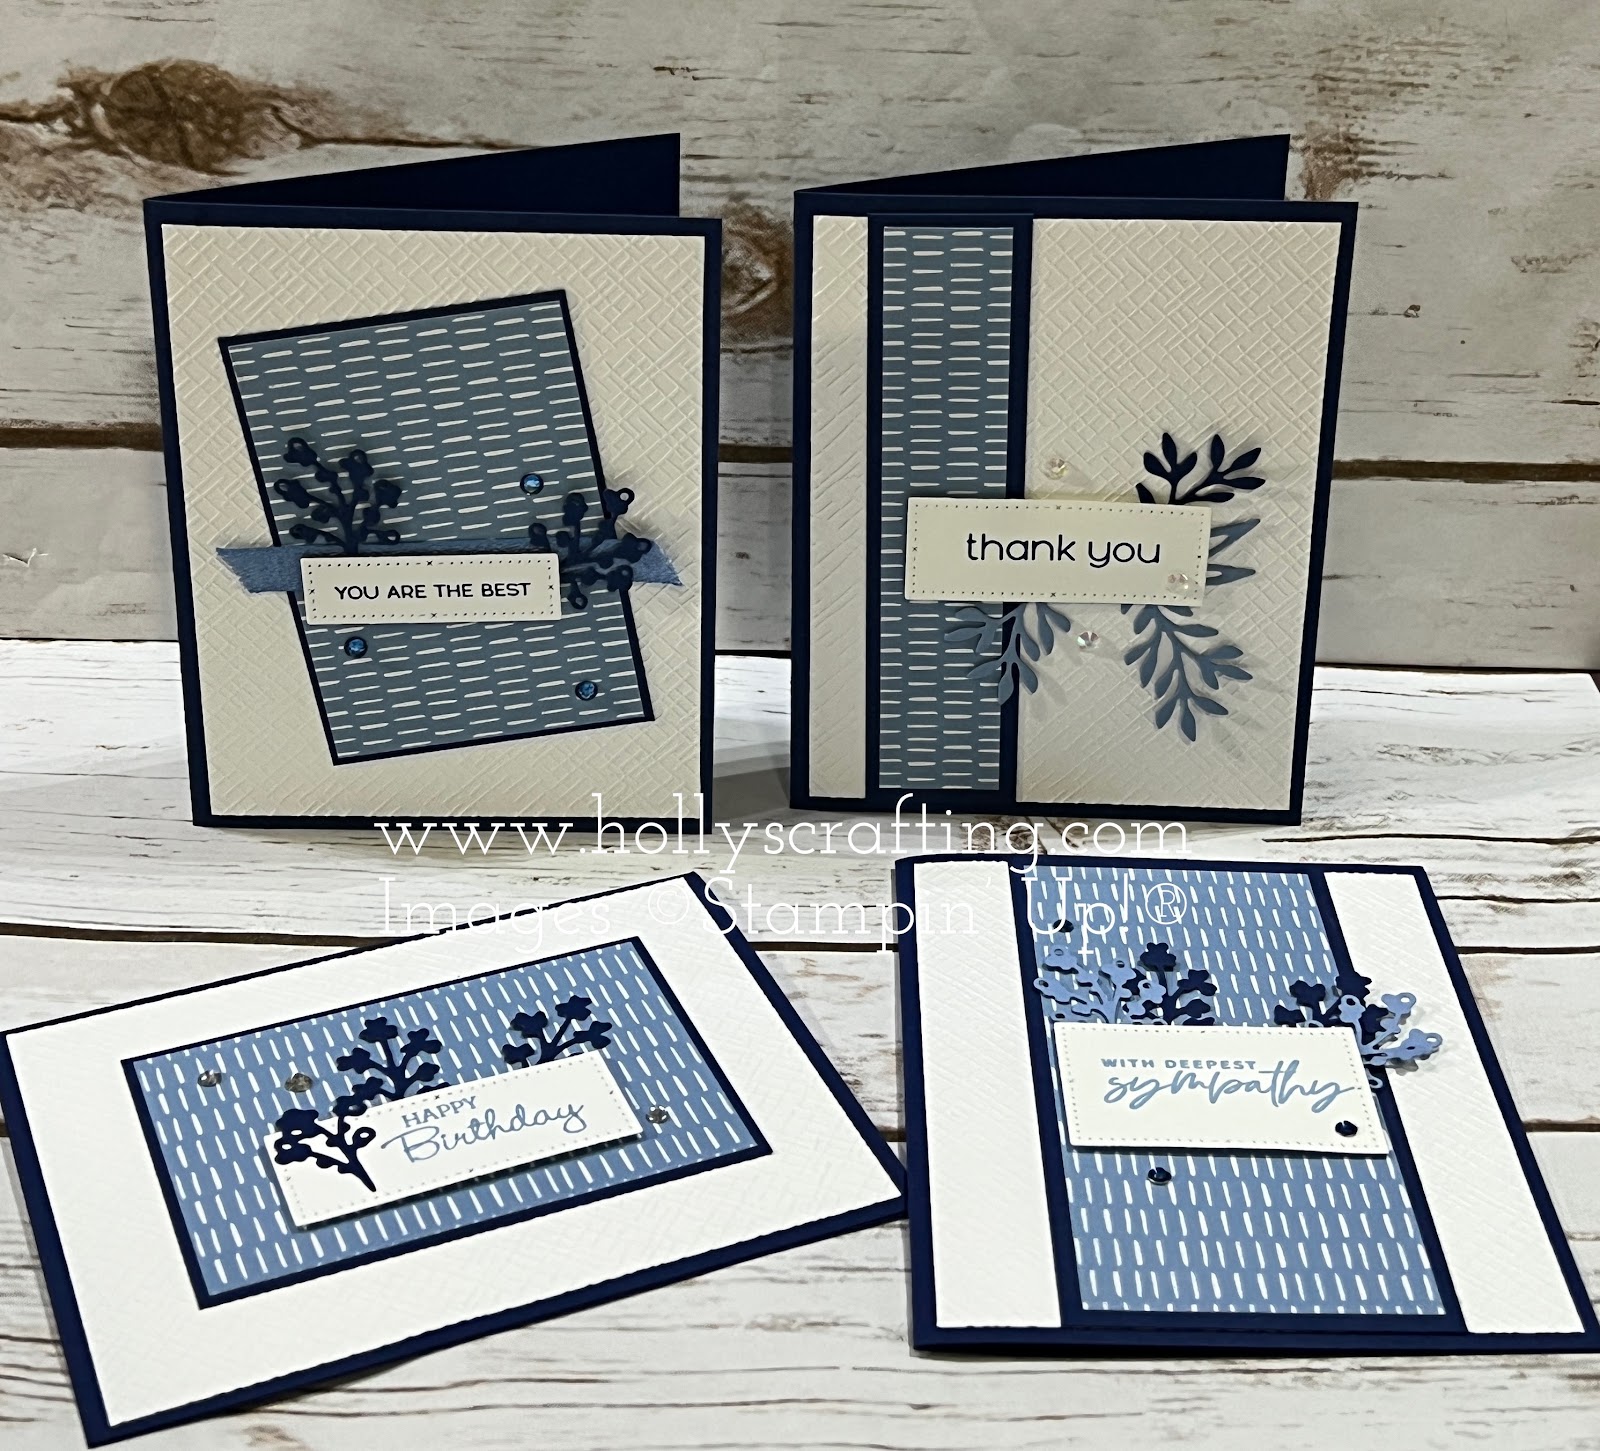
Hello my stamping friends.  I am back today with a One Sheet Wonder with 6 x 6 designer paper.  A week ago, I stamped along with France "Frenchie" Martin.  We both used 6 x 6 pieces of designer paper and show you in the video below how we each designed our projects for you.


My supplies for the above cards can be found HERE. This link will add all of the supplies to your shopping cart with me, so be sure to remove the supplies you already have.

Measurements:
Very Vanilla Thick - 4¼ x 11 scored at 5½
Very Vanilla - 4 x 5¼, 4⅛ x 5⅜, 2¼ x 7, scraps for greeting layers
Calypso Coral- 3 x 3½
Lost Lagoon - 2⅛ x 5⅜, 5¼ x 4, 3½ x 2¼, 5½ x 8½ scored at 4¼ for one card base
Top left card uses designer papers 2½ x 2¾ and 3¼ x ¾
Top right card uses designer paper 2 x 5¼
Bottom left card uses designer paper 5¼ x 1¼
Bottom right card uses designer paper 2¾ x 3½


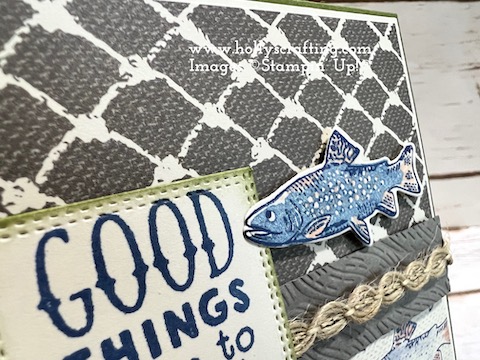
Above, I have my template for you.  This template was used for both sets of cards. I struggle with masculine cards, but in the video I show you how I made these cards with the Let's Go Fishing designer paper. I have those pictures and supply list below for you. 
Measurements for gone fishing card:
Very Vanilla Thick - 4¼ x 11 scored at 5½
Very Vanilla - 4 x 5¼, 2¼ x ½
Mossy Meadow - 3 x 3½
designer papers 2½ x 2¾ and 3¼ x ¾

Measurements for gone fishing card:
Very Vanilla Thick - 4¼ x 11 scored at 5½
Very Vanilla - 4 x 5¼, 1¼ x 2⅛
Mossy Meadow - 2⅛ x 5⅜, 1⅜ x 2¼
designer paper 2 x 5¼

Measurements for gone fishing card:
Very Vanilla Thick - 4¼ x 11 scored at 5½
Very Vanilla - 4 x 5¼, 1½ x 1½
Misty Moonlight - 5¼ x 1
designer paper 5¼ x 1¼

Measurements for gone fishing card:
Very Vanilla Thick - 4¼ x 11 scored at 5½
Very Vanilla - 4 x 5¼, 2 x 1¼
Misty Moonlight - 3½ x 2¼
designer paper 2¾ x 3½

Supplies for Gone Fishing cards can be found HERE. This will add all of the supplies to your shopping cart with me so be sure to remove the items you already have.

Click HERE to watch the video I did with Frenchie.

Thanks so much for stopping by!! I really appreciate it.
  
To get updates in your inbox when I post to my blog, please click HERE
 

CLICK HERE to shop with me 24/7.  


Sunday, July 2, 2023

Christmas Card Mega Class

Christmas Card Mega Class

Hello Stamping Friends,

I will be teaming up with France "Frenchie" Martin to offer you a mega Christmas card class in August.  This will be an all-day event as you will be making 8 Christmas Cards and 2 Fall cards.  Space will be limited so RSVP soon.  If you are not able to make the in-person class, we will be offering an online version of the class as well. The online version will include all of the pre-cut paper with any embossed/die cuts provided.  All you will need is ink, stamp sets and adhesive to complete your cards.

In-Person Class
When: August 26, 2023
Where: Wyoming Bank and Trust - 5827 Yellowstone Rd, Cheyenne
Time: 9:30 am
What to Bring: Potluck dish and adhesive of your choice
Cost: $35 - prepayment reserves your spot
RSVP: at your earliest convenience or at least by August 19th. Since space is limited, we will cut off registrations earlier if we reach our maximum.

RSVP by emailing me at dartbabe19@msn.com or texting me at 307-214-1442

This will be a potluck as well so please include in your RSVP if you are bringing a side, main dish or dessert. If we have too much of one category, we will ask if you can bring something else.

On-Line Live Class
When: September 9, 2023
Where: live on Frenchie's YouTube channel
Time: 9:30am MST
Cost: $35 plus Shipping of $6.95 (includes all of the paper items for all 10 cards. You will need ink, stamps and adhesive to complete)

Hugs,
Holly 307-214-1442

Thanks so much for stopping by!! I really appreciate it.
  
To get updates in your inbox when I post to my blog, please click HERE


CLICK HERE to shop with me 24/7.  


Saturday, July 1, 2023

Gone Fishing, Stampin' Up! with Video


Hello my stamping friends.  I am back today with a masculine card for you using the Gone Fishing bundle from Stampin' Up!. I struggle with masculine cards, but this bundle makes it super simple to create wonderful cards. I have the measurements listed below for you as well as a link for all of the supplies I used. I also have a video for you showing you how easy this card goes together.

Measurements:
Mossy Meadow - 4¼ x 11 scored at 5½
Very Vanilla - 4 x 5¼ (inside), 4⅛ x 5⅜, 3 x 2, 1½ x 2½
Pebbled Path - 4 x ¾ 
Designer Paper - 4 x 2, 4 x 3 (2 different prints)
Natural Wavy Trim - 6"


CLICK HERE for a complete list of supplies.  This link will add all of the supplies to your shopping cart on my site so just be sure to uncheck the supplies you already have.

You can view the video HERE, or by clicking on the video below. If you like my video, I would be very appreciative if you click the thumbs up and then subscribe to my YouTube channel.


Thanks so much for stopping by!! I really appreciate it.
  
To get updates in your inbox when I post to my blog, please click HERE


CLICK HERE to shop with me 24/7.  


Sunday, June 25, 2023

Patchwork Pieces dies with Video


Hello my stamping friends. With the 4th of July right around the corner, I thought I'd play with patriotic colors and the Patchwork Pieces die. I have a video below showing you how I put this card together.

Measurements:
Thick Basic White: 8½ x 5½ scored at 4¼ for the card base
Blueberry Bushel, Basic White and Real Red: 3¼ x 4¾ (cut each one with the Patchwork Pieces die)
Blueberry Bushel: 3⅜ x 4⅞, 3½ x ½
Real Red: 3¼ x 4¾, (if you want Celebrate in red then 3½ x 1½)
Basic White: 3½ x 1½
Silver foil: 1 x 2 *3

Supplies:
Thick Basic White - 159229, Basic White - 159276, Blueberry Bushel - 146968, Real Red - 102482, Silver Foil - 156457, Tear & Tape - 154031, Multipurpose Liquid Glue - 110755, Seal - 152813, Adhesive Sheets - 152334, Foam Adhesive Sheets - 152815, Patchwork Pieces dies - 161592, Wanted To Say dies - 161594


Don't forget to watch the video for all of the assembly tips and if you enjoy the video, I would appreciate it if you give it a thumbs up and subscribe to my YouTube channel.


Thanks so much for stopping by!! I really appreciate it.
  
To get updates in your inbox when I post to my blog, please click HERE


Customer Appreciation


 All orders of $40.00 or more before tax and shipping placed in my online store with Hostess Code AVBDRF66 qualifies for the FREE PDF. This month's file includes an emergency card kit that has 8 cards and a box to put them in. Would make a great gift. If your order is over $150 DO NOT enter the hostess code.  You will get all the stamping rewards and I will still send you the PDF tutorial.  All qualified orders will receive the download by e-mail.  


CLICK HERE to shop with me 24/7.  


Saturday, June 10, 2023

Inked & Tiled with Video


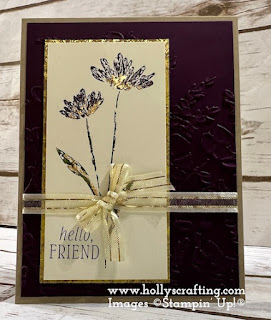
Hello my stamping friends.  Today's share includes a card that we made at my class this month. It shows how to use your Stampin' write markers as your ink pad and an additional way to add gilded leafing to your project. The video is linked below that shows you how to put this lovely card together, but I do have all of the measurements listed for you.


Measurements:
Crumb Cake - 4¼ x 11 scored at 5½
Very Vanilla - 4 x 5¼, 2¼ x 4½
Blackberry Bliss - 4 x 5¼
Distressed Gold - 3⅜ x 4⅝
Ribbon - about 6" and 8"

Click the image below for supplies list


I hope you enjoy my video. If you do, please like an subscribe to my channel.


Thanks so much for stopping by!! I really appreciate it.
  
To get updates in your inbox when I post to my blog, please click HERE


Customer Appreciation


 All orders of $40.00 or more before tax and shipping placed in my online store with Hostess Code AVBDRF66 qualifies for the FREE PDF. This month's file includes an emergency card kit that has 8 cards and a box to put them in. Would make a great gift. If your order is over $150 DO NOT enter the hostess code.  You will get all the stamping rewards and I will still send you the PDF tutorial.  All qualified orders will receive the download by e-mail.  


CLICK HERE to shop with me 24/7.  


Sunday, May 14, 2023

6 x 6 One Sheet Wonder with 4 cards and Folio to put them in with Videos


Hello my stamping friends.  My share for you today is a one sheet wonder making 4 cards from one 6x6 piece of designer paper.  I am doing this as part one of my May card class. In class, they will be using the Timeless Arrangements bundle along with the 2023-2025 In Color designer paper.  I did a video showing how to cut the paper and how to assemble the cards using the Layering Leaves stamp set with the Delightfully Eclectic 12x12 designer paper.

Supplies List for Timeless Arrangements cards:

Paper: Night of Navy - 100867, Basic White - 159276, BoHo Blue - 161724
Stamp Sets: Timeless Arrangements bundle - 161526, Pansy Patch - 154999, Something Fancy - 160416
Miscellaneous: Basics 3D Embossing Folder - 161598, Rhinestones - 144220, Night of Navy Blends Markers - 154891

Supplies List for Timeless Arrangements cards:

Paper: Basic Black - 121045, Basic White - 159276, Delightfully Eclectic - 161640
Stamp Sets: Layering Leaves - 161277, Inked & Tiled - 11158
Miscellaneous: Bough punch - 157711, Nested Essential Dies - 161597, Countryside Blossoms Embossing Folder - 161473, Tinsel Gems Three-Pack - 161624

Basic measurements for both sets of cards are:

Card Base: 4¼ x 11 scored at 5½
Basic White: 4 x 5¼ plus scrap for the labels
Card Stock for mounting designer paper: 2⅝ x 3⅞ *2, 2½ x 5¼, 1¼ x 5¼
Designer Paper: 2½ x 5 *2, 2¼ x 5, 1 x 5
Scraps for die cuts or punch outs


Thanks so much for stopping by!! I really appreciate it.
  
To get updates in your inbox when I post to my blog, please click HERE

Check out my video HERE or by clicking below.


This video will show you how to make the folio to hold the 4 cards in the previous video.  Click HERE or below to view.  


Shopping List for Timeless Arrangements: Click Here
Shopping List for Layering Leaves: Click Here

Customer Appreciation


 All orders of $20.00 or more before tax and shipping placed in my online store with Hostess Code BEPXXDEM qualifies for the FREE PDF. This month's file includes the labels for all of the stamps, dies folders and punches in the 2023-2024 Annual Catalog.  If your order is over $150 DO NOT enter the hostess code.  You will get all the stamping rewards and I will still send you the PDF tutorial.  All qualified orders will receive the download by e-mail.  


CLICK HERE to shop with me 24/7.  


Sunday, January 15, 2023

Two-Tone Flora Bundle


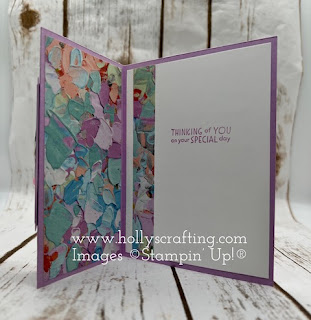
Hello my stamping friends.  I haven't posted in awhile, but I hope to get better at that.  My project for you today features the Two-Tone Flora bundle in the Jan - April 2023 Mini Catalog.  I love love love this bundle.  The flowers stamp beautifully and the dies are real easy to line up. I paired this bundle with the Fancy Flora 6x6 designer paper, which is part of the Two-Tone Flora Suite. Below I have all of my measurements and instructions for you as well as the supply list.

Measurements:
Fresh Freesia: 8½ x 5½ scored at 1¼ x 5¼ and a piece 2¾ x 3
Basic White: 2½ x 2¾ and 4 x 5¼ and 2 x 5 for stamping
Fancy Flora designer paper: 2¾ x 5¼ * 2 if you want one inside and 1 x 5¼ and ½ x 5¼

Instructions:
  • Fold card base in half and then fold the 1¼ section back onto card front.
  • Adhere designer paper on card front and the 1¼ section
  • Adhere designer paper to left inside section of card base
  • Stamp the greeting onto the Basic White 2½ x 2¾ layer towards the bottom center with Basic Gray ink
  • Stamp the inside of the flowers with Basic Gray ink and then the full flower images in Fresh Freesia, Balmy Blue and Calypso Coral (stamped off). Cut with coordinating dies.
  • Stamp the leaves in Soft Sea Foam ink and cut with coordinating dies.
  • Adhere the Basic White layer to the Fresh Freesia layer.
  • Adhere the flowers to the Basic White layer.  I used dimensionals on the large flower and the small flowers and leaves flat.
  • Add adhesive to the back of the Fresh Freesia just in the center and adhere to the 1¼ section of card base.  Make sure your adhesive doesn't pass this section.
  • Adhere the ½ designer paper strip onto the 4 x 5¼ Basic White layer on the left side.  Stamp the sentiment in Fresh Freesia. Adhere to inside card base
  • Stamp the flower onto the envelope.


Thanks so much for stopping by!! I really appreciate it.
  
To get updates in your inbox when I post to my blog, please click HERE

I have the complete supplies list for you.  Just click the image below to be directed to my online store or you can SHOP HERE.  This link will add all items to your cart so just be sure to remove the items you already have.


Customer Appreciation


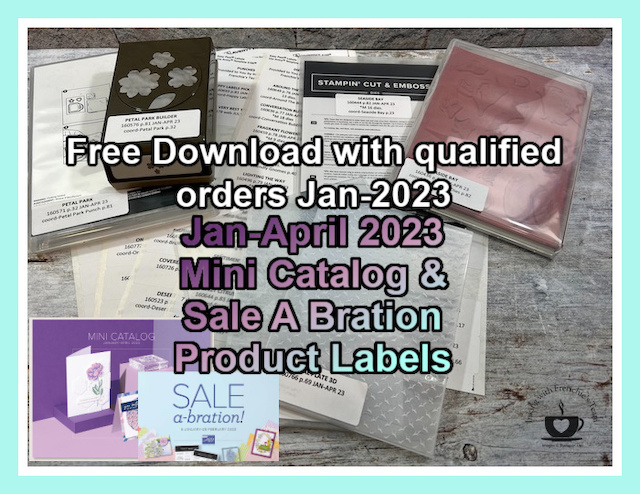
 All orders of $20.00 or more before tax and shipping placed in my online store with Hostess Code 6R6U6TA qualifies for the FREE PDF. This month's file includes the labels for all of the stamps, dies folders and punches in the Jan-April 2023 Mini.  If your order is over $150 DO NOT enter the hostess code.  You will get all the stamping rewards and I will still send you the PDF tutorial.  All qualified orders will receive the download by e-mail.  


CLICK HERE to shop with me 24/7.